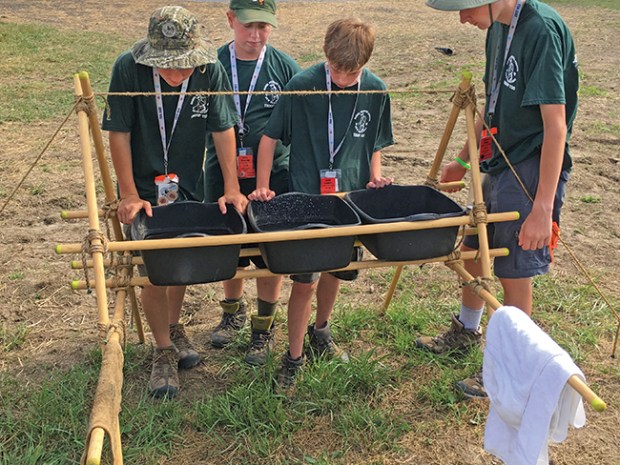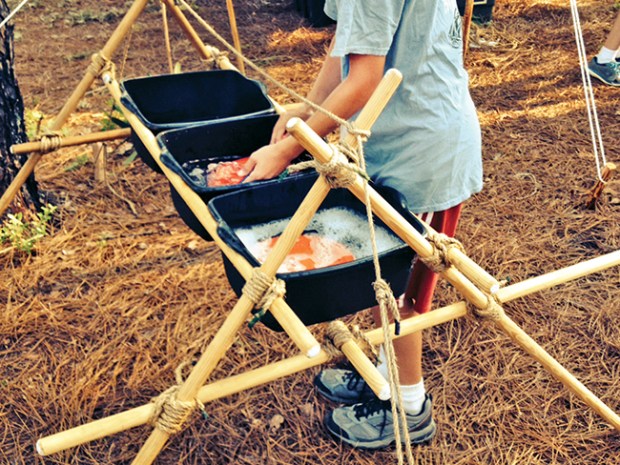
This dishwashing rack is sturdy enough to hold the standard three containers used for backcountry dish and utensil cleaning. Here’s how to build it.
Click here for more detailed directions and information about the lashings required.
WHAT YOU’LL NEED
- 10 5′ Scout staves (or hiking staffs)
- 14 6′ x 1⁄4″ lashing ropes
- One 20′ x 1⁄4″ lashing rope
- Two narrow pioneering stakes
- Three wash basins around 18-quart size with edges at the top
HOW TO LASH A DISHWASHING RACK

1. Using six Scout staves, lash together two identical A-frames. In this design, one side of the bottom Scout stave joining the two legs will purposely extend out much farther than the other on each A-frame — a place to hang towels or cookpots. Lash the bottom staves in place about 28 inches from the top of the legs.
2. Next, stand up these identical A-frames so they’re about 4 feet apart. Take a 20′ line and find the midpoint. At about two feet away from this midpoint, tie a clove hitch at the top of one of the Scout staves of one A-frame. Repeat this process on the other side, attaching the line with a clove hitch to the top of one of the Scout staves of the other A-frame.
3. Secure each end of the 20′ line to stakes driven into the ground about 5 feet away so the line extends out evenly from each side of this framework. After the tension is adjusted, the two A-frames will stand up in an impressively rigid fashion.
4. Tightly lash two staves to the inside of the legs of each A-frame, about 20 inches from the top. The front and back edges of the wash basins will rest on these staves.
5. To support the bottom of the basins, lash on the two remaining staves parallel to one another, on top of the bottom Scout staves that join the A-frame legs.
6. Once you check to see all the lashings are tight, and the central rope is secure and stabilizing the structure, then you’re ready to bring on the basins. Position them side by side and fill them about 75 percent of the way up.

Powered by WPeMatico
